Security 101: Beginning with Kali Linux
I’ve found a lot of people who are new to security, particularly those with an interest in penetration testing or red teaming, install Kali Linux™1 as one of their first forays into the “hacking” world. In general, there’s absolutely nothing wrong with that. Unfortunately, I also see many who end up stuck on this journey: either stuck in the setup/installation phase, or just not knowing what to do once they get into Kali.
This isn’t going to be a tutorial about how to use the tools within Kali (though I hope to get to some of them eventually), but it will be a tour of the operating system’s basic options and functionality, and hopefully will help those new to the distribution get more oriented.
Table of Contents
{:.no_toc}
- Table of Contents {:toc}
What is Kali Linux, and Why Do I Need It?
Kali Linux is a Linux distribution that is derived from Debian Linux, but is specialized for security testing work in several ways, the most obvious of which is the pre-installation of a variety of security testing software. As described by the Kali team themselves:
Kali Linux is a Debian-based Linux distribution aimed at advanced Penetration Testing and Security Auditing. Kali contains several hundred tools which are geared towards various information security tasks, such as Penetration Testing, Security research, Computer Forensics and Reverse Engineering. Kali Linux is developed, funded and maintained by Offensive Security, a leading information security training company.
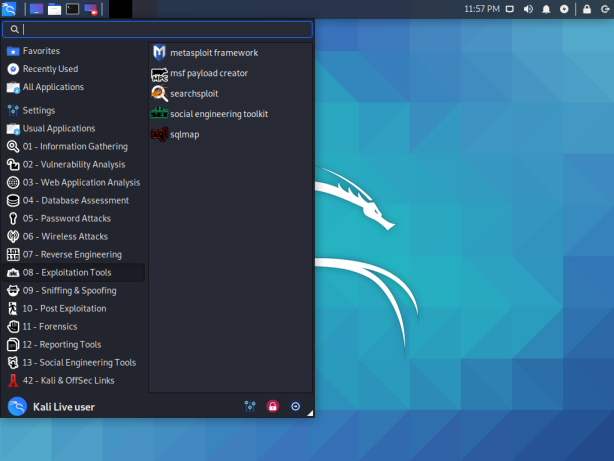
Kali includes over 600 penetration testing tools in its repositories, but some of the more commonly used ones include:
- Metasploit
- Burp Suite
- Aircrack
- nmap
- Wireshark
- John the Ripper (JtR)
- sqlmap
 {:.center}
So, why do you need Kali Linux for these tools? Well, the short answer is that you don’t. The longer answer is that Kali provides these tools and a wealth of others already configured and (more or less) ready to go out of the box, so it’s a very nice situation to be in, but not an absolute must. Kali isn’t the only linux distribution to do so, either. There are several others, including the very smooth and visually appealing Parrot Security, the Arch Linux-based BlackArch, and the Gentoo-based Pentoo. I can only recommend BlackArch or Pentoo if you’re already familiar with their base distributions – neither one is particularly friend to “noobs”, in my experience.
You can, alternatively, manually install the tools yourself, or use tools that will manage your tools for you, such as the PenTesters Framework (PTF) or katoolin. Some people have switched to using Docker for a lot of their tools (I’ll have a post about that coming soon as well) or other methods of managing their toolset.
Install or Live? Virtual Machine or Bare Metal?
There’s two general approaches to running Kali Linux: either as a “Live” distribution (formerly known as a “LiveCD”, but I don’t suppose CDs see much use anymore) or installed. When running in a “Live” configuration, the system completely resets itself on each boot. (There is an option for “persistence” on a flash drive, but that’s a bit of an edge case.) In the Live case, nothing about your previous session carries over from one to another – your history, your settings, any additional applications you install – nothing. An install, on the other hand, is like any other operating system – all your changes will persist on disk and carry over from session to session.
Live Environment
In general, I suggest the Live approach when you’re first getting started because you make no permanent changes and can get used to things. If you don’t actively choose to do so, it won’t modify the drive of your computer, and you can always go back to your normal OS anytime you want. It’s a great way to find out whether Kali is useful for you and how you like it. You can also take some of the other distributions I listed above for a spin as well. Obviously, the Live approach may be useful if you’re regularly using a bunch of different computers, but I’m not sure how prevalent that is.
Installed
If you want to use it for actual work, I like a full installation rather than
the Live media approach. This is because I will significantly customize the
installation to my particular needs. Among other things, I will set up
configuration files for various programs (sometimes called “dotfiles”), install
additional applications, and other customization. (For example, I use zsh
instead of bash as my shell.)
Both the Live and Installed approaches can be run both in a piece of virtualization software or on “bare metal” (directly on your computer). In the case of virtualization, Kali runs within your base operating system, giving you access to both the Kali tools and your host operating system’s tools and files. In the case of bare metal, you either boot from a Live USB or install to a partition on your hard drive/SSD to run the Kali installation.
Virtual Machine
In a virtual machine, you install a piece of Virtualization Software, such as Virtualbox, KVM or VMWare, then run Kali Linux within that software. Your Kali installation will essentially seem like a window within your regular operating system (whether Windows, Linux, or MacOS), called your “host” operating system. This allows you to have access to all your host OS applications and data, as well as access to Kali. You can boot the live image, or create a virtual disk for an installation. Additionally, most VM software supports the idea of “snapshots”, where you can roll back changes to your installation to a checkpoint. This allows you to undo changes that may break your system or be otherwise undesirable. A virtual machine also leaves your host operating system unaffected, so you’re unlikely to break your entire OS installation.
There are some downsides to virtual machines, however. Most notably, you need to split the hardware resources of your computer between your host operating system and the “guest” (Kali). CPU isn’t usually a problem if you’re not doing anything too intensive, but RAM can be. I would expect to want at least 4GB of RAM for each your host and your guest, so I would not try virtualization without at least 8GB of RAM. You’ll also need to be more aware of your networking setup, since incoming packets will go through both your host OS and your guest, so you may need to setup some kind of bridging or port forwarding to accept incoming connections. Additionally, doing wireless or hardware attacks can be harder because you’ll need to forward the raw device into your virtual machine.
Bare Metal
For a bare metal setup, it’s easy enough for a Live environment. Just plug in your prepared flash drive and tell your computer’s UEFI/BIOS to boot from it. For an installation, it’s a bit more complex. If you’re not going to dedicate a computer to only Kali, you’ll probably want to “dual boot”, which will require either resizing your existing installation or reinstalling. You’ll also need to install a bootloader that allows you to select between your installations. If you go for a bare metal installation, be absolutely certain to backup anything you care about first! I’ve known more than one person to make a mistake in repartitioning a disk and destroying data – including myself!
Basic Kali Usage
First and foremost, Kali Linux is a Linux distribution. If this is your first foray into Linux, you will have somewhat of a learning curve. Sorry, it’s to be expected when moving into something new. If you’ve been a Windows user up until now, you will need to learn a few new things. Linux distributions are a collection of the kernel (Linux) and a set of applications. Most of them are based on the GNU Collection of utilities, the POSIX specification, and some Linux Foundation standards.
For example, rather than having “drive letters”, all of the files on the system
are in a hierarchy delimited by /. So you’ll see paths like /etc/passwd,
which is a file called passwd in a directory called etc in the root of the
filesystem.
Since Kali Linux is based on Debian Linux, it shares the software package
management tools used by Debian. This means tools like apt and apt-get for
installing software pre-packed for Kali. To search for software, you can use
apt search <keywords> and then to install a package, you can use
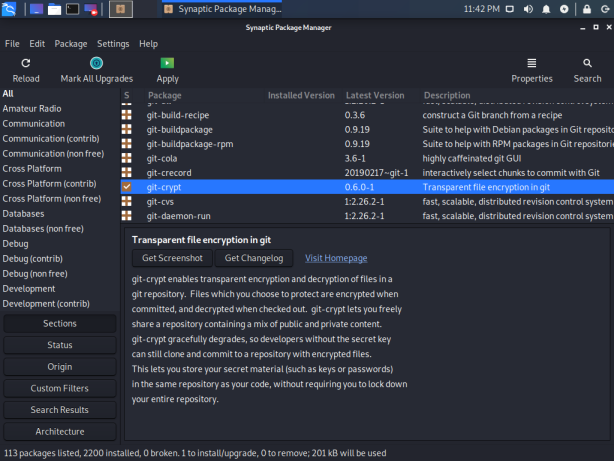
apt install <package names>. If you want a GUI for package management, you
can open a console and then run apt install synaptic for the synaptic
package management GUI (which is a front end to apt itself, so uses the same
underlying data).
 {:.center}
Some distributions are different, so if you have experience with, say, Fedora,
not everything will translate directly – for example, the use of apt instead
of yum or dnf for package management. Static network configuration is also
quite different, although both of them support systemd based configurations.
Hacking Tools
Obviously, if you’re using Kali, you want to get into the hacking tools included. It’s a good idea to give them a try in a controlled space, like a home lab or the levels on PentesterLab or the boxes on Hack the Box.
Rather than trying to learn all of the tools at once, I suggest checking out a
single area at a time. If you’re interested in Web Security, learning Burp Suite or mitmproxy and some of the other web tools like sqlmap. If network
pentesting is more your area, check out metasploit. For network forensics,
learning wireshark can be useful.
Customizing Kali
Additional Software
There’s some software that doesn’t come in the default Kali image that you might
or probably want. It ships with Firefox as the default browser, but you might
prefer Chrome, Chromium, or the Brave
Browser. On older versions of Kali, simple command
line tools like git and tmux were not present, but they now are. vim is
available by default, so I’m set, as is nano, but if you’re more of a Sublime
Text, Atom, VSCode, or emacs user, you probably want to install those.
Some people like additional utilities like the terminator terminal emulator.
If you have a license for any commercial security tools, now’s the time to install that. I have a Burp Professional license, so I install that first thing, but Burp Suite Community Edition is included if you’re just getting started.
As an aside, if you’re doing web application assessments, penetration testing, or bug bounty hunting professionally, I can’t recommend paying for a Burp Pro license enough. It’s reasonably priced and the ability to save/restore projects is alone worth the license, not to mention all the scanners and other features that come with Professional. {:.sidenote}
There are also many metapackages that install additional security tooling in
bulk. These all begin with kali-tools-, such as kali-tools-sdr for Software
Defined Radio tools, kali-tools-forensics for Forensics tooling, or
kali-tools-exploitation for exploitation. If you want to see all of the tools
included in one of these metapackages, you can use apt-cache depends to get a
list of the direct dependencies:
apt-cache depends kali-tools-sdr
kali-tools-sdr
  Depends: chirp
  Depends: gnuradio
  Depends: gqrx-sdr
  Depends: gr-air-modes
  Depends: gr-iqbal
  Depends: gr-osmosdr
  Depends: hackrf
  Depends: inspectrum
  Depends: kalibrate-rtl
  Depends: multimon-ng
  Depends: rtlsdr-scanner
  Depends: uhd-host
  Depends: uhd-images
Personal Setup
Make it your own! There’s some things that you can do to get it set up for you and make your experience more comfortable.
- Select and customize your shell. Kali ships with
bashby default, butzshis also popular and mostly a drop-in replacement forbash. Some people likefish. Many like to customize their prompt to display more information. - Set a nice wallpaper. Yes, this is trivial, but it makes me feel better about the OS being “mine”. I’m a big fan of the work being done by David Hughes in his 100 Days of Hacker Art.
- Setup tools that require personalization, such as setting your name/email for
git, adding any custommetasploitresource files, configuring your editor of choice, etc.
Using Kali Professionally
There are some who claim that Kali is not (or should not be) used by professionals in the industry. I think this is a bit of a perception that “real hackers” have to do things the “hard way.” In reality, there are plenty of professional penetration testers who use Kali Linux on a regular basis. There are, however, some things you can do to make it more useful in this context.
I start by creating a virtual machine installation of Kali and customizing it to my needs by placing my dotfiles on the system, installing additional software (Chrome, my Burp Suite Pro license, VPN configurations, etc.), then taking a virtual machine snapshot. Then, for each engagement I’m working on, I clone that snapshot and run a VM dedicated to that engagement. This gives me a clean start for each engagement and prevents data related to one project from creeping into another project’s VM. Each time I update the base image, I take a new snapshot – this way, if a software update introduces a bug or breaks a feature, I can trivially go back to an older (known working) version so I’m not interrupted in the middle of a project.
Remember that, as a penetration tester, you will have access to lots of sensitive data about your clients/employer & their engagements. You should enable full-disk encryption with a strong passphrase to protect their data, credentials, access, etc. Ideally, this would be on your host OS (or Kali itself, if a bare metal installation). If you can’t do that for some reason, at least enable FDE on the Kali install in your VM. Change the default password, and if you must enable SSH, then make sure you set it to allow only SSH keys. Protecting your client’s/employer’s data is a significant responsibility for penetration testers.
Kali Warnings
Anonymity
Kali Linux is an operating system designed for professional penetration testers, not for accessing the internet anonymously. By default, it does not do anything to hide the source of your traffic, such as routing through a VPN, Proxy, or Tor. If your primary concern is anonymity, such as in countries with filtered internet, operating as a whistleblower, journalists in a society with a less-than-free press, etc., you should look for other tools to meet those needs. Tools designed for those use cases will be more effective at protecting you.
If you are performing an authorized penetration test or bug bounty, you may want to use a VPN to reroute your traffic to simulate a particular adversary, but anonymity is not your primary concern, since it is an authorized test. If you’re doing other shady things, you really need to learn about proper OPSEC and don’t just pick up Kali Linux and expect it to solve your problems.
Running as Root
It used to be the default to run Kali as root, and if you use an older version,
it will still be configured that way. They’ve changed that recently, but some
users may still want the “old” way. There’s a few downsides to running as root,
the most notable of which is to protect you from yourself. It’s much easier to
make a mistake like rm -rf / tmp/x (notice the space) and blow things up when
running as root. Additionally, some types of sandboxes will not run properly
as root (because it’s too easy to escape them), so things like Chrome will not
work properly as root.
Other Resources
- Kali Training by Offensive Security
- Kali Linux Revealed: Mastering the Penetration Testing Distribution
- Linux Basics for Hackers: Getting Started with Networking, Scripting, and Security in Kali
KALI LINUX™ is a trademark of Offensive Security. ↩︎